Done got me a lincoln

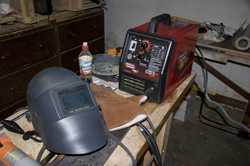
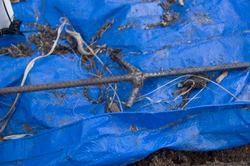
One thing I’ve wanted to for a long time now is learn how to weld metal. I took a class a couple years ago but I didn’t take it very far. I didn’t have an idea for a project to provide context. Because I want to make a larger Rocket Stove, the idea of welding was recently rekindled.So I poked around on ebay and found myself a new Lincoln 175HD The other day, I welded up my first useful thing. I got a couple pieces of rebar I had lying around from an older project and made a compost aerator/stirrer. I got the idea from this. The idea is that I jam the pointy end into the compost pile and let the barbs move things around. Works pretty well, though it does require some strength. Either way, no “black man” should be without a lincoln. Well, now, I’ve got one too.

Composting horse manure

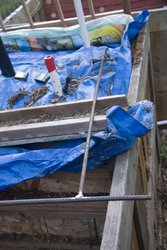
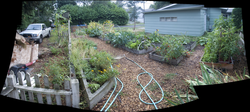
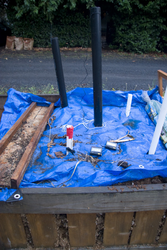
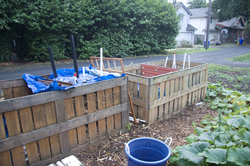
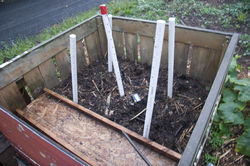
Here’s a picture of our garden stitched form pictures this evening It’s been a good season. Better than last year; Robie and I are learning a lot. Most folks I know that have a garden have noticed that the season’s been less productive than we’d like, but we’re pleased with the success we have had and what we’ve learned. On my drive home, I pass by a horse ranch Abbey Creek Stables. Although it’s not there anymore, they used to have a sign at the entrance “Free manure. We load”. Since you can never have enough compost and because I like the word “free”, I went and got some. Two loads actually for a total of about two cubic yards. Composting is one of those things that sounds more complicated when you read about it than it actually is. Websites and books talk about cabon/nitrogen ratios and all that. Some refer to it as browns/greens. I’ve generally found that what I’ve got is what I’ve got. If I have too much green, like from cutting the grass, I can’t just conjur up some leaves to balance it out. Whatever I have is what ends up in my compost bins. Having said that, horse manure actually has an optimal ratio. The manure I got is a nice mix of what looks to be sawdust and manure. Good even texture. It heated up pretty quickly. Since I was thinking about composting at the time, I did a bit of reading. One site I came across talked about a simple way of aerating the pile with perforated pipes. This is actually mentioned in a bunch of places, but the key is that the microbes that process compost need oxygen. Most sources advocate turning the compost pile, but that’s a lot of work. So I got a couple lengths of 1″ pvc and drilled a bunch of holes. I also had a couple lengths of ABS. I went to Harbor Freight and got some thermometers to track what the pile is doing and now I have two of them in the manure pile. The one in the center quickly climbed outside the working range of the thermometers (159 deg) and it stayed there for about two weeks. The other one is in the corner and hung out at around 140 deg. The active composting temp range that I’ve come across in a couple places is about 110-160 deg. Today, three weeks after I got the second load of manure, the center is at 140 deg and the corner is 120. I’m curious to see how it’ll look when things cool off and I dig around in there. The manure is under the blue tarp. The other pipes are normal compost. One thing I am a little concerned about is an ariticle I just read in mother earth news about some herbicides surviving through horses’ digestive systems. If it all works out, I’ll probably get a bunch more loads of the stuff. Oh, and it doesn’t stink at all.

soap making (take 2)

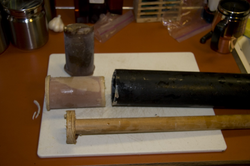
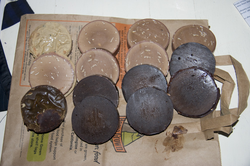
This past weekend, my sister Jovan and I tried another round of soap making. The first round went well and the soap does it’s job. The problem was removing the soap from the molds.The mistake I made at the time was not using a wonderful thing called the internet. A two minute google search tells me that the trick is to freeze the soap in the mold. It worked like a charm. As always, you can click on the pics for a larger one.

Green Lakes

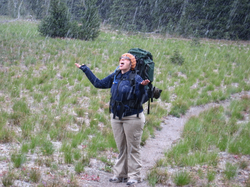
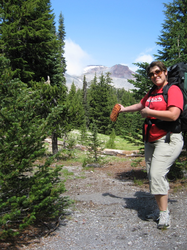
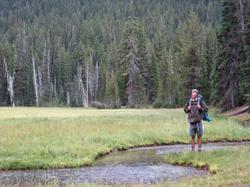
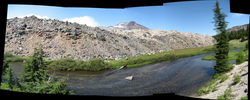
More pics at Green Lakes pictures Robie and I went camping last week for Labor Day. We went Green Lakes, OR which is about 30min west of Bend. We drove down Friday night and slept in the “bed” of my truck and hiked up Sat morning. There were a fair number of people and due to the fact that you can only cmap in designated campsite, I was a little worried we’d find a place. anyway. We found a great site, but there was little excaping of the wind. We did have a spot maybe 50 feet that we pretty well sheltered, and we basked a bit in the sun in the afternoon. Once the sun went down, it got pretty cold though. I have a rubber water bucket that I use for filtering (must easier than squatting by the stream) that I’d left out overnight. It got about 1/4″ or 3/8″ layer of ice. The next day was much windier and chillier. Still very nice but not as much ufn. We had intended on camping Sunday night as well, but we elected to just hike back. We took a side route which was VERY nice. Anyway, the pictures are more interesting than me rambling about it. 😉

Interview skills

About a month and a half ago, right at the end of my sabbatical, I went on a interview with the company AutoDesk for a position working on their Inventor product. In the end, I didn’t get the job; they went with an internal transfer, but the experience was a great learning experience for me anyway. The last time that I interviewed for a job, the only time, really, was 15 years ago. I was fresh out of college and hence it was a different kind of experience. This time around, I’ve had years of experience and the questioning goes beyond the stuff you learn in computer science classes. I’ve interviewed a bunch of people for Intel. How to prepare? What will they ask? About a week before the interview, I got an email with my interview schedule with the topics each person is supposed to drill me about. Some of it was easy stuff. Basic programming skills, design patterns… Some of it worried me more: math concepts, geometric modelling. Knowing that they deal all day with 3-dimensional curves and shapes, I dug out my old computer graphics book and did a bit studying. The day of the interview came and went. I fielded all of their questions and I’m mostly happy with my answers, but it wasn’t quite the “shock and awe” I had hoped for. It took them 2.5 weeks to give me their decision, so I would tend to believe that they went with a transfer. You never know though. The majority of applicants to Intel that I’ve screened/interviewed were pretty marginal (at best) but perhaps AutoDesk gets a different breed of programmer. I did learn a lot through the process.
  1. Getting an interview schedule can be helpful. Going through a bit of my computer graphics book made it easier to field several of the questions.
  2. A standard question that people ask (I’ve asked it myself) is, “tell me about something that you’re worked on that you feel good about and what was your contribution to it.” I didn’t really have an impressive answer to this.
  3. A bunch of the questions were about how to handle certain situations. These are often best answered in terms of work already done. when doing this, I repeated used my most recent work, but I’d done much more. I could have squeezed in references to those.
  4. Back in the 90s my dept (I’ve been in the same dept for the whole 15 years I’ve been at Intel), we had a lot of buzz around the CS concepts/books of the day. Code Complete, 10 things for better c++, and design patterns. We don’t really do that anymore. From the schedule, I knew they would ask me about Design Patterns, but I didn’t brush up on them thinking that I’d lived it. The problem was, I forgot the names of most of the patterns, so during the interview, I probably gave the appearance of figuring it out as I went along more than actually knowing it. Either way, the key learning here is that I need to be sure to review stuff I already know and make sure I stay up to date with current trends. Not just for interviewing, but to make sure I know it.
  5. If someone asks me a riddle type question that I’ve already seen, after I telling them I already know the answer, instead of just giving it to them, explain the logic behind it anyway. It feels a bit car saleman not to.
Either way, it seems fair for them to hire someone from inside the company with a track record. Also, it’s harder to take the risk on someone with my expected pay grade than someone fresh out of college. Maybe I’ll get a call from one of them sometime in the future. I’m glad I did it. Oh, there was one interesting thing that did happen. One of the guys, a younger member, asked me how to take a string and reverse the words in place. The answer is to first reverse all of the letters and then use the same function again to reverse each word in place. The follow up question is, “what’s the time complexity?”. The answer is O(n), but he insisted it’s O(n^2). He tried to explain why, and it wasn’t complete rubbish. It was still wrong though.
Interview skills

Liftoff

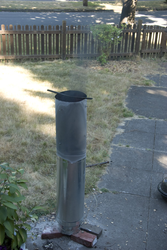
In the continuing saga off no-smoke charcoal making, I’ve added air injection to the system.In recent runs, I could tell the fire wasn’t getting enough oxygen. There were a couple reasons I knew this.
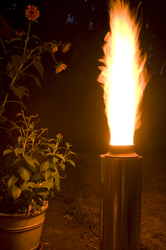
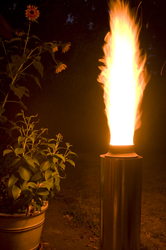
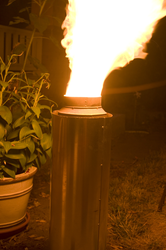
  1. when running just the stove, I got a red jet flame out of the top. A picture from a previous post:

    If everything were running optimially, there’d be enough oxygen inside the stove that all combustion can happen inside the stove. Said another way, volitile gases waited til being exposed to outside air before doing their thing.

  2. another reason; pretty much the same as #1, when making charcoal, I got a red flame around the paint can. I want it to be a nice bright flame under the can.

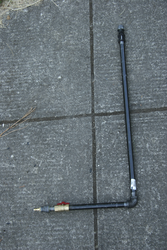
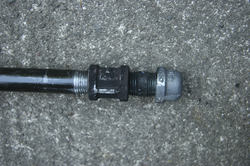
So I’ve added a supercharger.It’s kinda hard to see in the thumbnail, I drilled four small holes in the length of pipe between the cap and the coupling (actually, it’s called a nipple… heh heh, he said nipple ;-)). The other end of the pipe, but the valve is a connector that allows me to hook it to my air compressor. Air flows from the compressor through the valve (the throttle), through the pipe that runs through the middle of the combustion chamber when I get the side benefit if heating the air, and then it’s injected into the flow of gases coming off the fire. (check me out, using all this technical sounding language. you’d think I’m a rocket scientist. I’ll have to mail my fried Jose who actually IS a rocket scientist. literally)
Well, it worked quite nicely. I now get only a little bit of smoke right at the beginning of the burn. Best of all, it’s starting to SOUND like a rocket!!! I need to find a microphone so you all can hear it. Very cool. One by product of it all is that it burns to completion much quicker. I haven’t opened the paint can yet so I’m not sure if I got charcoal through out. If not, I’m gonna try adding a thermal mass to the upper section like I already have with the stove itself. Might make it a bit top heavy. My friends out there are probably starting to think that I’m losing my mind. Hopefully, the cool factor of it all compensates. I trust you’ll let me know. I’ll close with something this all makes me think of, the guys at Purdue that lit charcoal in a bbq using liquid oxygen.

charcoal take 2

actually this is take four.
  1. exit hole on top. Mistake. lots of uncombusted smoke
  2. exit hole on bottom. Better, but still lots of smoke
  3. pipe extention to inject smoke into the heart of fire. That worked, but the ducting I was using still leaked smoke.
  4. today’s experiment
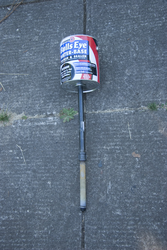
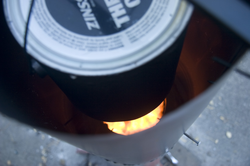
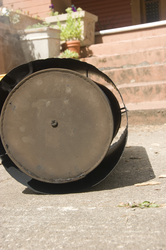
Somehow, the thought of using an old paint can came to mind. I looked at my collection of paint and I found two that were bad. I took the old primer can with thick yogurt consistency. Plus there was only 1.5″ left. I cleaned it out and drilled a 1/2″ hole in the bottom for the pipe. Notice the elbow to reduce the chance of stuff getting in there. Also the small hardware cloth cage to ensure a clear path to the pipe. The outside of the can is a 3/4″ wash with threads cut into it using the pipe thread cutter I got from Harbor Freight. Here, you can kinda see the pipe extending down into the fire. The first batch had some smoke, but I suspected that’s the coating on the can burning off.
The results are pretty good, though not very much of it. Need to find a larger paint can. Somehow I remember the existence of 2.5 gallon containers.

charcoal

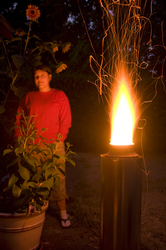
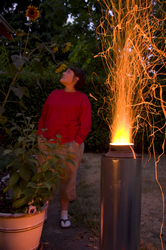
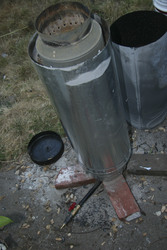
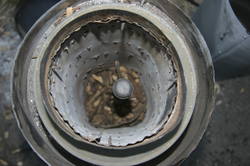
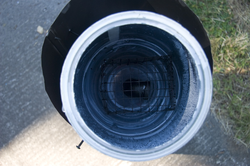
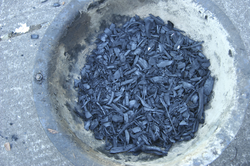
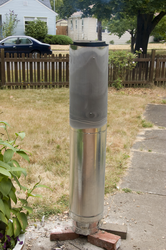
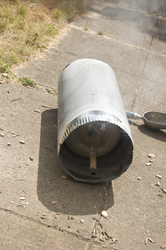
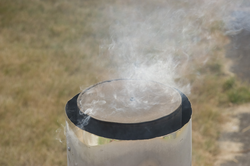
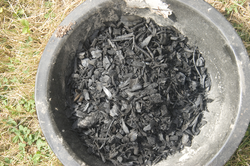
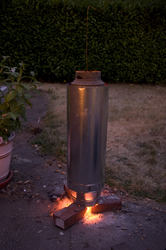
When wood burns, what’s really going on?As I understand it, it’s a 2.5 step process. 1) Heating the wood causes it to vaporize into its component molecules. 1.5) depending on the temperature, the longer, more complex molecules decompose into simpler molecules. Larger molecules don’t burn as well. Axle grease doesn’t really burn. Gasoline does. If you heat up axle grease enough, it will break down to something that will burn. 2) The simpler molecules burn and the larger ones got up in smoke. The point of my rocket stove is that the fire happens in a hot space and I get more complete combustion due to that concentration. That’s been working pretty well. Over the last year or two, I’ve read a couple times about Terra Preta and how it can be used to help revitalize farming soil and also serve as carbon sequestration. After I hear about it again on Science Friday. In the story, the guest described the charcoal making process as simply heating wood to about 400 or 450 degress F in an oxygen poor environment. This was also something that I’d read and thought about before due to this site So I figured, why not try it myself? My results have been good so far, but the process makes too much smoke. First, I took some left over ducting and, together with two end caps, I make a canister about 10″ diameter and 16″ long. I suspended this canister inside a piece of 12″ diameter ducting. I suspended them with screws similar to how I did the rocket stove.   I then crimped the end of the 12″ ducting so I would fit snugly on the stove. On the first try, I put a vent hole on the top, but this was not such a good idea because it produced a LOT of smoke. I removed it from the stove and let it cool off. I sealed the hole with a bolt and drilled a hole on the bottom. This worked better, but still had more smoke than I cared for. Since smoke means incomplete combustion, I need to channel the smoke into the heart of the fire, so I took a piece of iron pipe I had around and had it extend from the bottom of the canister down into the fire. This helped things a bit, but the canister itself wasn’t sealed all the well. Smoke was escaping through the seams. Not realy sure how to fix that. The whole thing heats up enough that solder will melt. to attach the iron pipe, I used a ring bolt from my box of electrical parts. It’s from one of those things that hold wires onto a metal junction box. Anyway, it melted off! so the experiment hasn’t quite panned out. If I were living in the country, it’d be good enough, but here in the city,… not so much. Here’s the first batch. Charcoal. If you take a piece of it and break it, it’s consistent throughout. So the next step will be to figure out a way to seal the canister or to make another one that doesn’t have these issues. Maybe #10 food cans. I’ve also thought about some sort of shroud to expose the smoke to more heat. will hvae to think about it some more. Here are some more cool fire pictures. 😉 Oh. One thing I forgot to mention. I added more holes inside the rocket stove, so there more airflow. It doesn’t burn like this for very long, but it’s pretty spectacular.
 

puzzler

say you’re sitting in a boat in the middle of a pond. In the boat with you, there’s a big rock. You chuch the rock into the water and it sinks to the bottom. Does the surface level of the pond go up or down?computer programming puzzle: say you have a string like “the cat is sitting on the wall” and using only one piece of temp storage, reverse the other of the words. In the previous example, you want “wall the on sitting is cat the” another programming puzzle. say you have a ray from the origin to a point in the first quadrant (both x and y are positive). I give you another point. Is the point to the left or right of the line?