Recently, I’ve been thinking about how wood burns. It started when I read a post on the blog
The Oil Drum when someone posted an opinion that instead of turning celulose into alchohol, we should just burn it by gasifying. As I understand it, when you heat wood, it gives off gases that will burn. It you make it hot enough, the carbon chains in the gases will reduce to simpler modecules that burn well and this is the key to a clean burn.This prompted me to do a bit of googling and that brought me to the
WoodGas website which goes into more detail about how it works as well as information on how to make simple cookstoves, particularly for use in less developed countries. More googling and I arrived at a description of the
MIDGE stove.
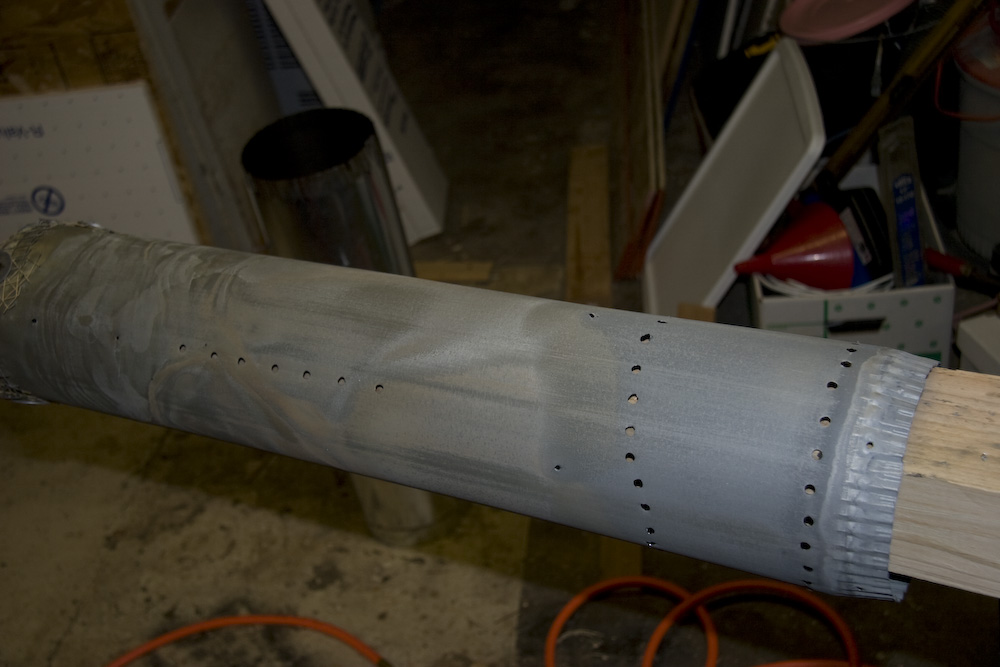
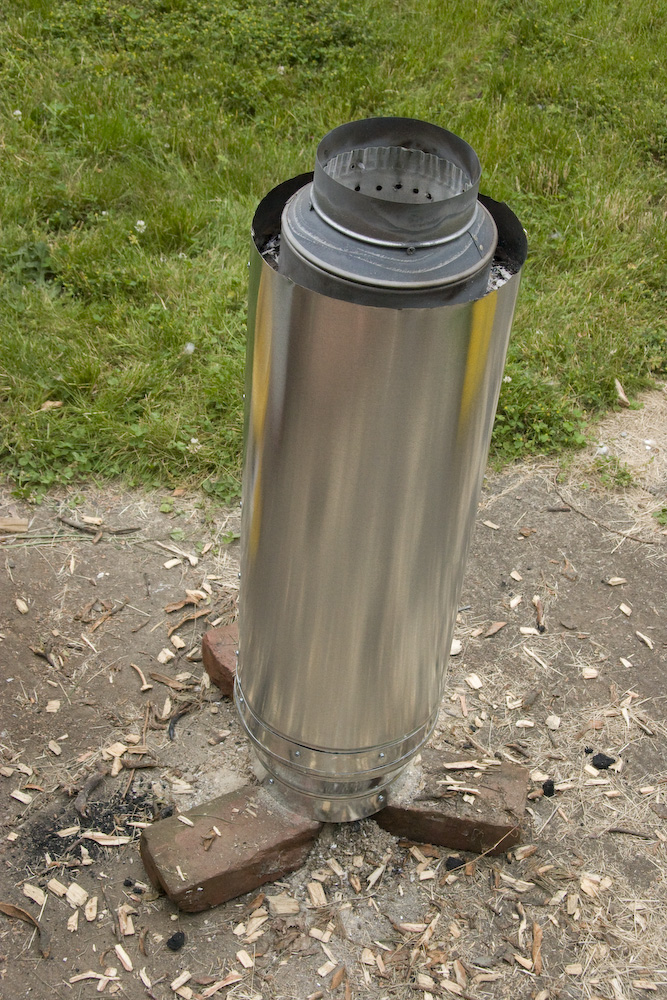
Since I’ve been on sabatical, the last couple weeks, I’ve had some free time and I decided to build a stove out of ducting. I also have a big pile of woodchips that I got for free from a friend whose an arborist. The stove is composed of three lengths of ducting 6″, 8″ and 10″ in diameter, two reducer flanges and mesh.
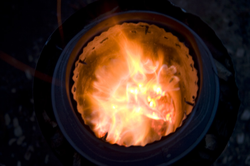
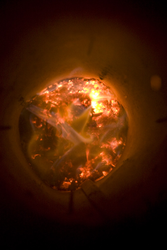
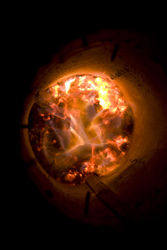
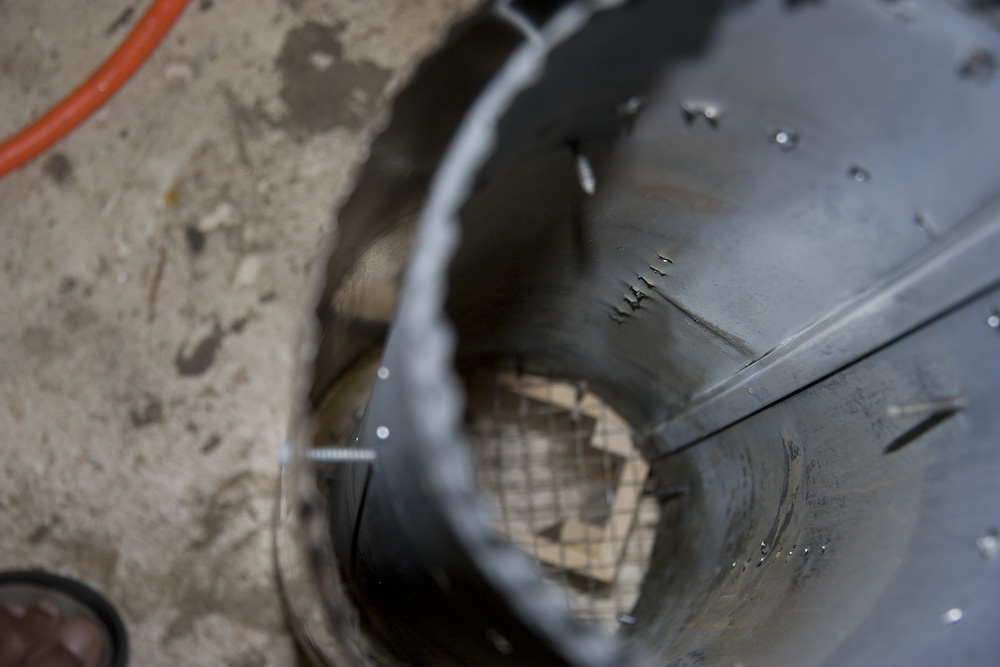
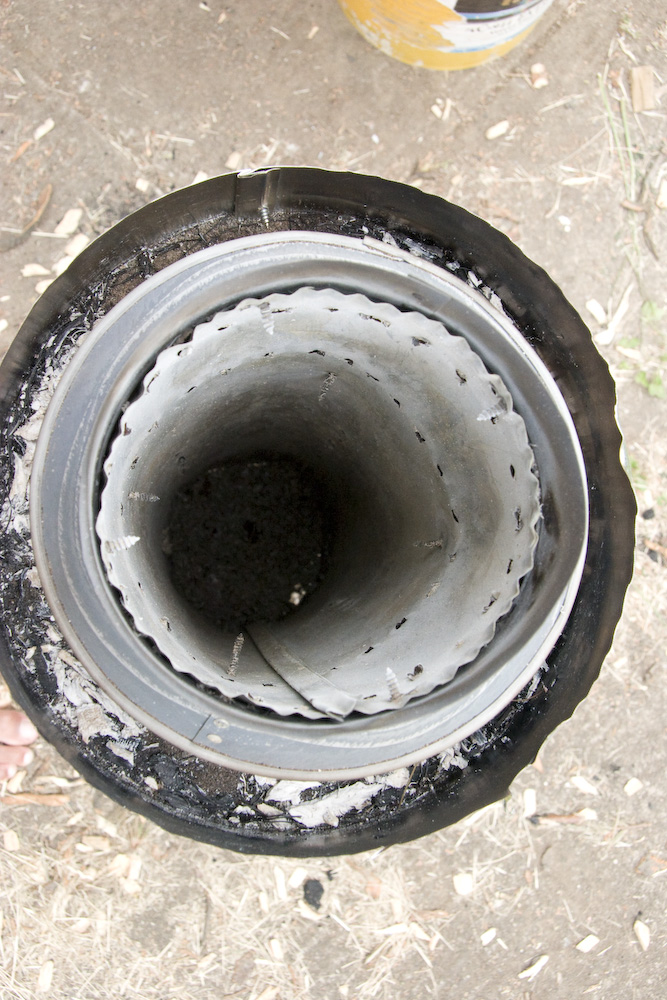
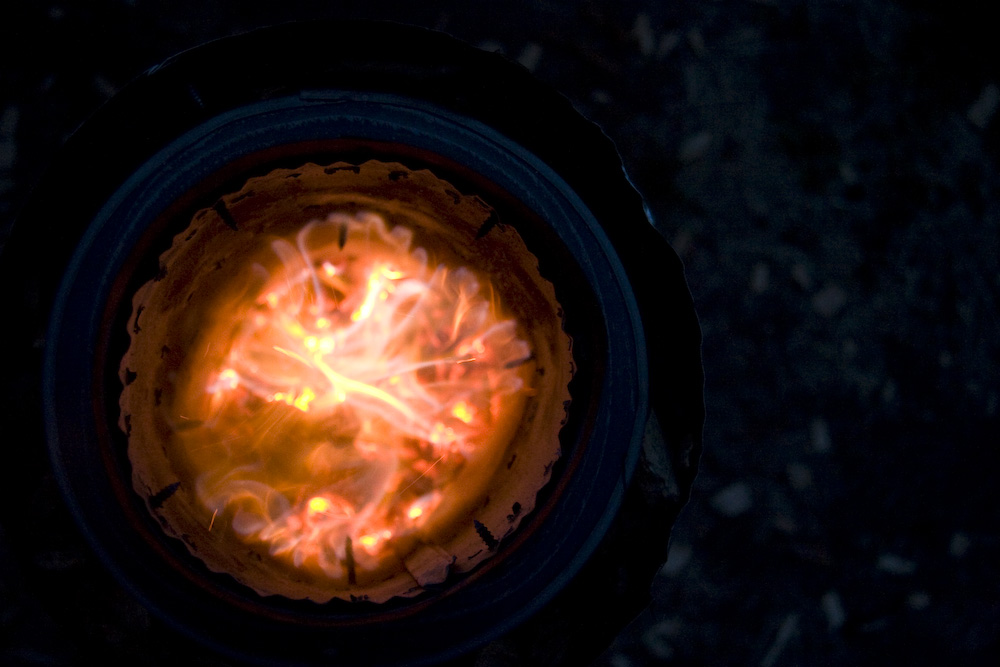
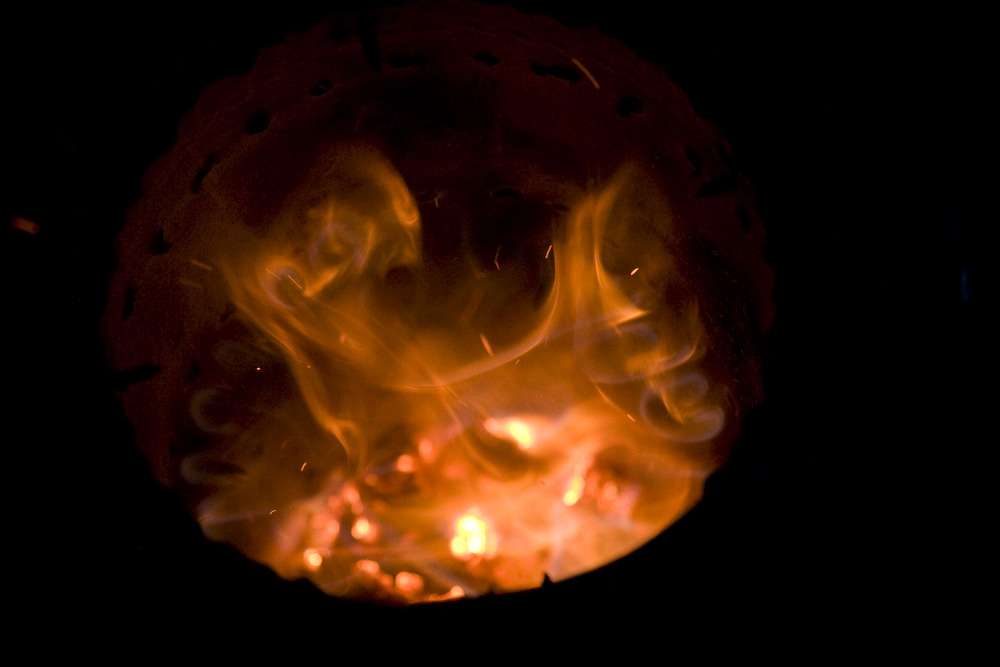
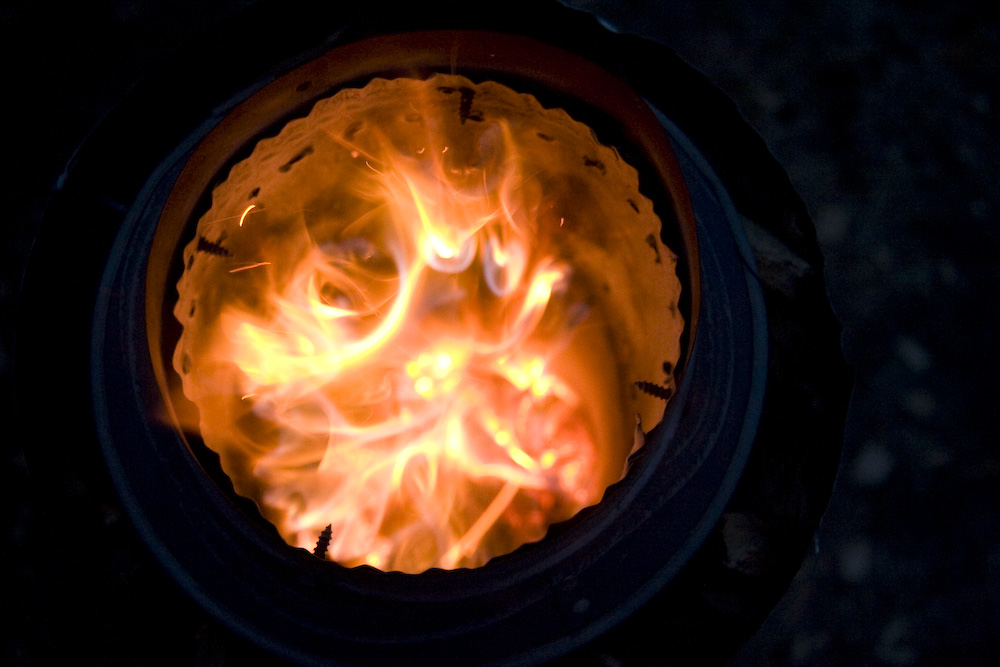
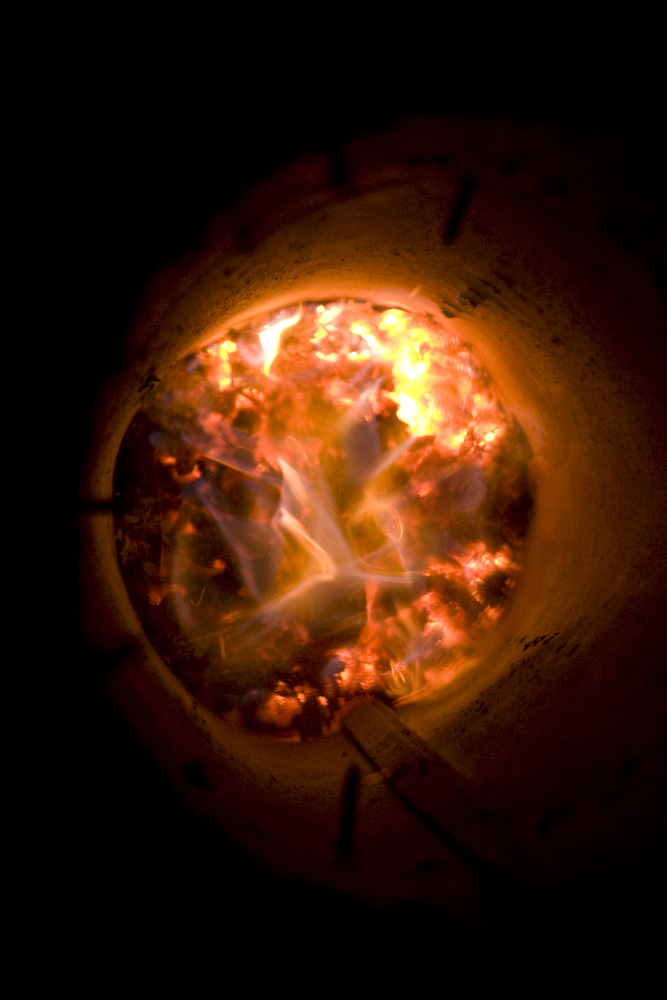
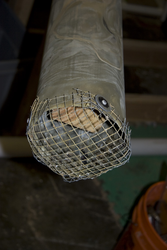
The 6″ duct holds the woodchips. The screen is to allow plenty of air to come through. Note the 4″x4″. This is not a part of the stove, it’s only to hold the duct, so I can drill holes. When the stoves is running, the chips burn from the top down giving off fumes. The ring of holes at the top of the duct injects more air into the stream of gases for combustion. One of the keys is to have it all happen in a hot, contained space. This is one of the main differences between a woodstove or fireplace insert and a basic fireplace. In a fireplace, it’s difficult to maintain a sufficient heat density.
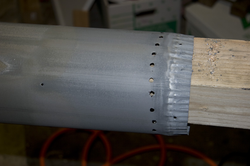

Once I had the center duct with plenty of holes (I actually want to add more, but that’ll require me to take the whole thing apart), I put it inside the next larger duct (8″) using a reducer flange and some sheet metal screws. Hopefully, the pictures illustrate it better than I can in words. The purpose of this is to guide heated air up and out of the holes using the chimney effect. Warm air rises.


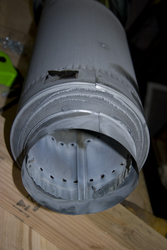
Now I have a duct that holds the chips and serves as a firebox. I have a mechanism for heating air and injecting it into the volotile gases. On it’s own, this works ok. Knowing that maintaining a hot space is key, I added a third duct (10″) to shroud the rest of this stove. The space between the 8″ and the 10″ is filled with sand. From reading around a bit, wood ashes serve as a good insulator, so maybe I’ll try that, but right now, I don’t have enough ashes. I did have sand though.

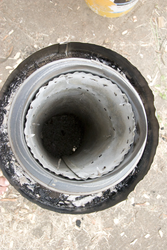
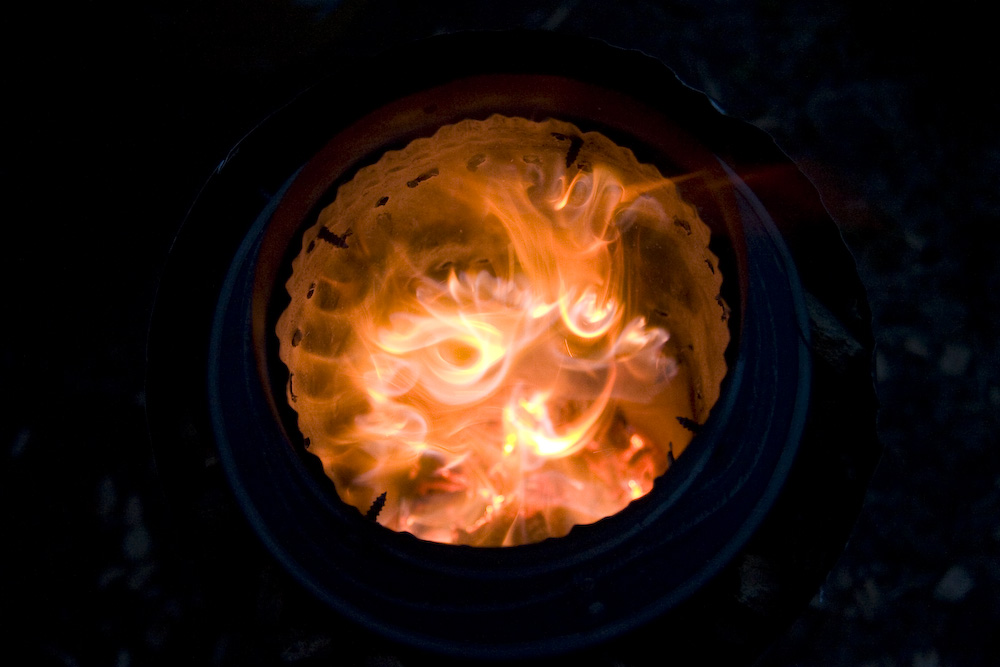
I fired the stove up a couple times and it’s pretty cool to watch. I’m using green woodchips, but it only takes about 5 min for it to get going and stop smoking. Through experimenation, I’ve found that if the flame goes out, you get a LOT of smoke. The neighbors were probably wondering if I’d planning on burning down the house. This means you can’t realy add fuel to the fire once it’s going. Maybe using dry wood would change this dynamic, but for now, I’ll have to do it in batches.
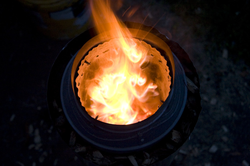
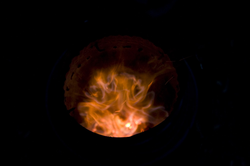
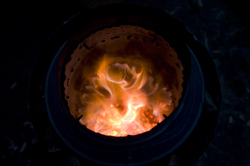
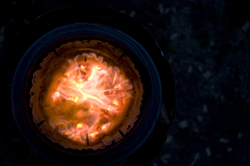
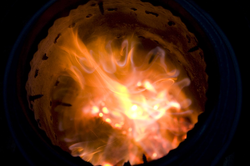
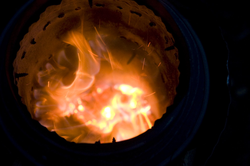
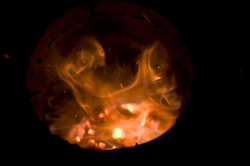
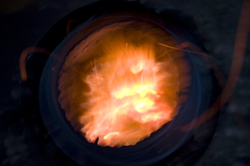
Here are some pics of the flame. Notice how it jets out from the air holes.